Want to become a travel blogger and make money sharing about your travels? Do you want to make passive income from your laptop but have no idea how to get started?
I’ve been there!
Before I quit my Corporate job, I knew I wanted to pursue blogging as one of my passive income ventures because of my love for travel.
Fast forward today, I have built a multiple 6-figure travel business as a professional travel blogger, influencer, and online business owner, sharing travel inspiration from around the world.
I have worked with amazing luxury hotels and travel brands, and have time freedom, location freedom, and financial freedom thanks to my blog.

Starting a travel blog can really open up a world of opportunities, from building a community of like-minded travelers to making passive income.
Let’s get started with this tutorial to show you exactly how to start one the correct way from the beginning, so you don’t make the same mistakes I made!
This article contains affiliate links. Which means I will earn a small commission for purchases made through these links, at no cost to you. To learn more, click here.
What is a travel blog?
A travel blog is an online blog with posts, tips, and resources around travel.
There are so many types, locations, and niches within travel blogging. Think: adventure travel, solo female travel, backpacking travel, digital nomad travel, city-specific travel etc.
Travel bloggers will usually share their own experiences and guides in their blog posts, so each one is completely unique.
As long as it is dedicated to travel in some capacity, it is a travel blog!
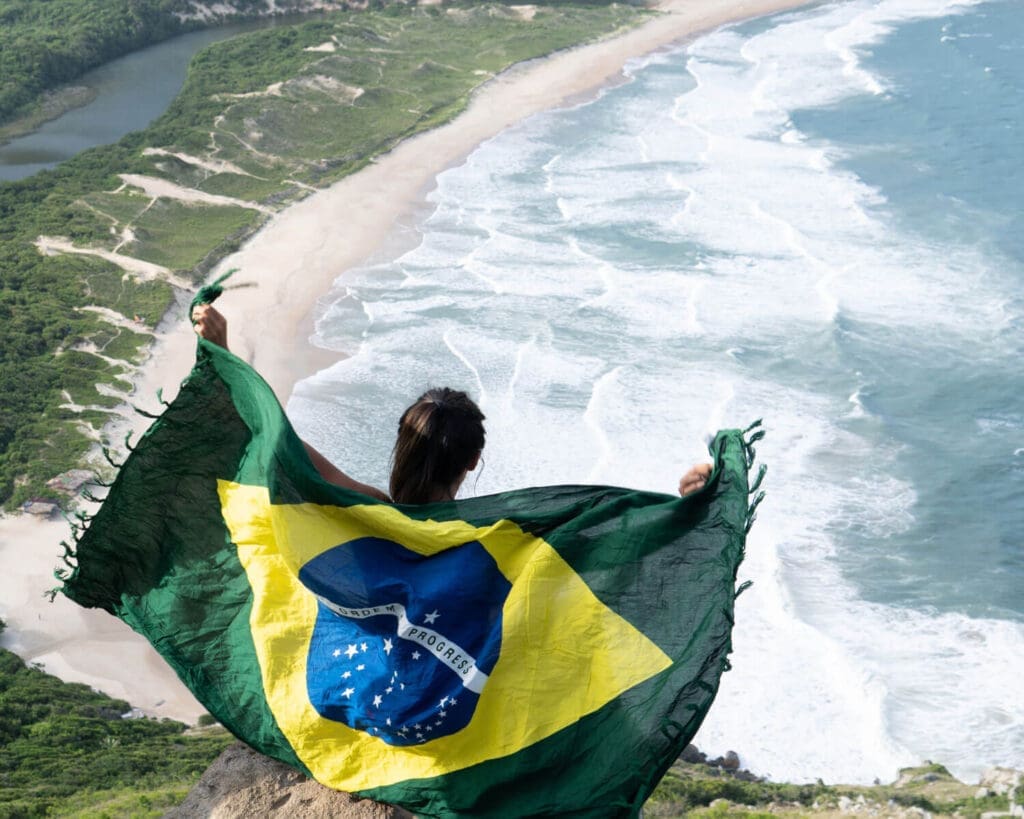
Read my travel blog post example Top 5 Beaches in Florianópolis, Brasil.
How do travel bloggers make money?
Travel bloggers make money through affiliate marketing, display ads, paid press trips, sponsored content and links, and offering their own digital products and services.
Most bloggers I know have multiple streams of income coming in from their travel blog, some of which are completely passive.
The great news about starting your own blog and becoming a business owner is that there is no limit to how much money you can make online.
With the ability to grow your audience, grow your traffic, and grow your products and services, it is an extremely scalable business model.
We will get into exactly how to monetize your travel blog later in this article.
Why start a travel blog?
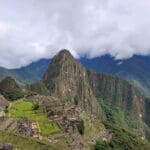
The travel blogging niche can be a fulfilling and exciting opportunity to share your love for travel with the world, and help your readers with their travel planning.
Not only can it be a great way to make money from your passion, but it also opens up many other possibilities such as building a personal brand, networking with other bloggers, getting paid to travel, and creating a portfolio of work.
Make money while doing what you love
One of the biggest benefits and probably the reason why most of us want to start a travel blog, is the opportunity to make money while sharing your love for travel with the world.
As you grow your brand and website traffic, you can make more money that supports something you love doing.
Build an audience
By consistently creating and sharing high-quality content, you build a dedicated audience of readers who are interested in your travel experiences and insights.
You can use this audience as leverage to get collaborations, clients, and customers.
Network with other bloggers and influencers
As a travel blogger, you’ll have the opportunity to connect with other bloggers and influencers in the travel industry.
This can lead to collaborations and partnerships around the globe.
Meeting other bloggers and influencers is so much fun because they align with a freedom-based, entrepreneurial lifestyle. I always feel like I’ve found my people!
Build a personal brand
A travel blog can be a powerful tool for building a personal brand, whether you’re looking to become a recognized travel expert or simply share your travel experiences with others.
Get free travel and get paid to travel
Many travel bloggers are able to secure free or discounted travel opportunities as a result of their blog. This can come in the forms of press trips and sponsored trips as well as free stays or experiences.
Create a portfolio of work
Your blog serves as a portfolio of your work and can be used to showcase your writing, photography, and videography skills to potential clients or employers.
Get to know the world
Blogging about your travels also gives you a chance to learn more about the world and its different cultures, which can be a fulfilling and enriching experience.
Learn new skills
Blogging requires learning a number of new skills, such as writing, photography, SEO, social media marketing, and more.
No matter where you begin, you will learn so many new skills while building your successful travel blog.
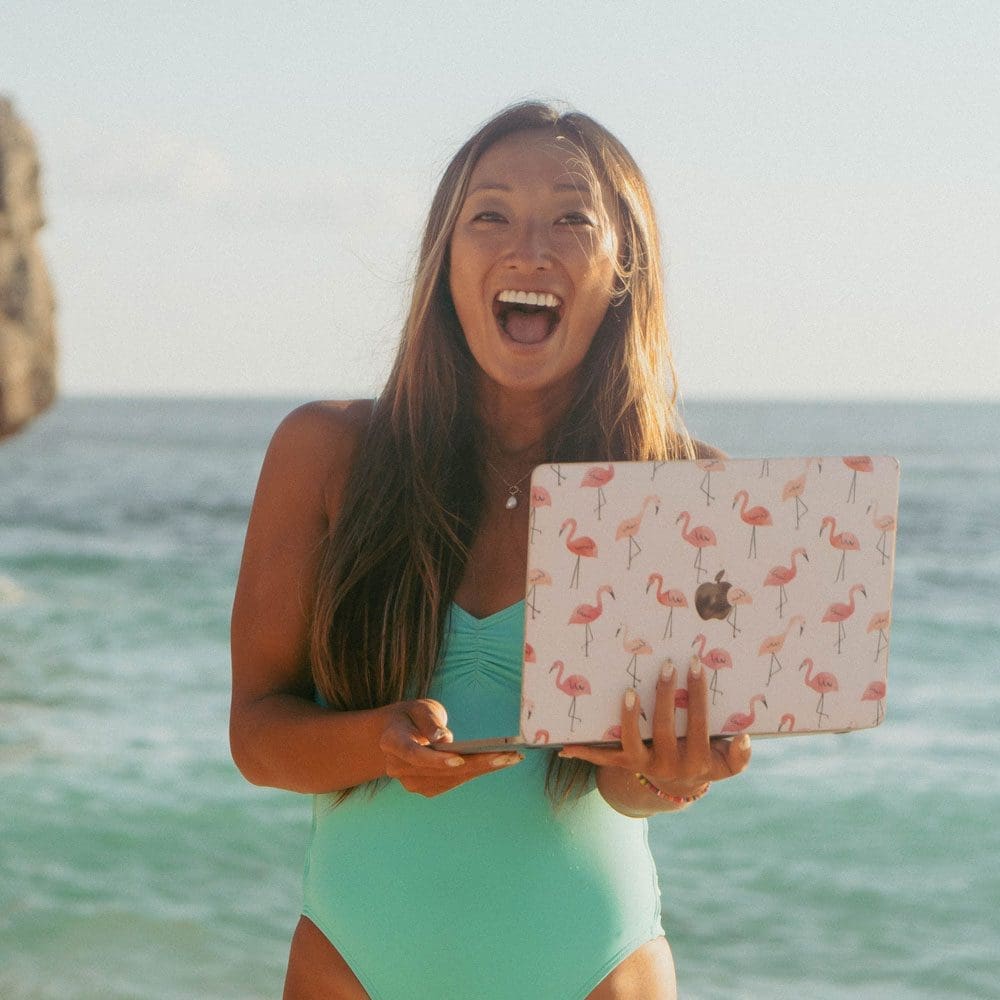
Be your own boss and work from anywhere
Now one of my personal favorite things about having a successful travel blog, is that travel blogging can potentially turn into a full-time job and replace your salary.
This means you can work from anywhere in the world as long as you have internet connection!
Top Travel Blogging Tips
There’s no overnight success in blogging
Starting a travel blog is a challenging but rewarding journey. It’s important to have realistic expectations.
There are no shortcuts to success and no easy way to a regular income in travel blogging.
It takes a lot of time, dedication, and perseverance to build a successful travel blog.
But with the right strategies and tips, you can get there faster and achieve your goals!
Contrary to popular belief, the most successful travel bloggers aren’t lounging on the beach sipping cocktails.
They’re working hard to document their adventures, manage their website, and build relationships with brands and destinations.
It’s not a vacation, but if you’re passionate about travel and storytelling, it won’t feel like work either.
There is a big difference between WordPress.COM vs. WordPress.ORG
When it comes to searching blogging websites, you’re going to come across WordPress.
WordPress is a free and open-source content management system (CMS) based on PHP and MySQL.
It is used to create and manage websites, blogs, and other forms of online content.
It is the most popular CMS in the world, used by millions of websites. But there are two very different versions of WordPress.
WordPress.com is free. WordPress.org is self-hosted.
While both versions are great for building a website, there are some key differences between the two that make WordPress.org the better choice when starting your travel blog.
Choose your hosting carefully!
The main difference between the two versions is hosting.
WordPress.com might be easier, but you have many limitations.
This is a hosted platform, which means everything is taken care of for you: from hosting, to security, to backups. This heavily limits the amount of control you have over your website.
Here, you actually don’t fully own your website!
With WordPress.org, you have a full control and ownership over your website which is essential for your growth.
One of the main benefits of using WordPress.org and hosting your own site is the ability to install third-party plugins and themes.
You can add security plugins and link services such as ActiveCampaign or Stripe seamlessly.
You can add a plugin that allows you to build complicated contact forms, or install a new premium theme that can completely change the visuals of your travel blog.
Ultimately, when you self host your WordPress website, you can do anything you want rather than having limitations.
WordPress.org is the better choice for you if you want to allow for growth and be a full-time blogger. If you’re just doing this for your friends and family and are not taking it too seriously, WordPress.com may be the better option.
In this post we are looking at self-hosting our travel blog, and you will soon see it is significantly easier than it sounds!
Reasons to choose paid hosting over free blog websites
I originally started this blog for free on Blogspot.
But because I had to stick to their limited features, I couldn’t customize my blog the way I wanted to, I couldn’t monetize, and had to start over from scratch on my new hosting provider.
Don’t make the same mistake I did!
If you want to eventually monetize your blog, having a self-hosted blog is a MUST.
On top of this, paid hosting benefits include:
- Ownership and control: Self-hosting your website gives you complete ownership and control over your content and design. Free services like Blogspot or WordPress.com own your blog, and can take it down at any time! With self-hosting you have the power to manage monetization, design, and branding.
- Customization options: As we touched on before with self-hosting, you have access to a wider range of customization options and can fully personalize your website to match your brand.
- Monetization opportunities: Self-hosted websites offer more monetization options, such as advertising, affiliate marketing, sponsored posts, and e-commerce. This allows you to earn money from your blog and turn it into a profitable business, which is a big part of what we are talking about here!
- SEO benefits: Self-hosted websites have more flexibility and control over search engine optimization (SEO), which is an essential part of getting people onto your website and read your content.
- No limitations on storage and bandwidth: As you grow and get more monthly traffic, you will require more resources. With self-hosting, you have the ability to upgrade your hosting as your traffic grows, which is not the case with free services.
- Personal email address: With self-hosting, you can use your own custom email address that corresponds to your website. This can help to increase your website’s professionalism, making it far more professional when you want to connect with other bloggers and brands. Your own email means that you don’t have a @gmail.com email, and instead have hello@mynewtravelblog.com.
- Better analytics: Self-hosted websites offer more detailed analytics and tracking options such as google analytics, allowing you to monitor the success of your blog and make data-driven decisions.
- No ads: Self-hosted blogs do not have the ads that free platforms like wordpress.com and blogspot have, this provides a better user experience for your readers and makes your website look more professional. It also means that when it comes to monetizing you have control the ads shown on the site, and YOU make the money from them.
Why choose Bluehost to host your new travel blog
For self-hosting, I use Bluehost and here is why I recommend them.
Bluehost is an outstanding web hosting service and the one that kickstarted The Wanderlover blog to where it is today.
Their service is incredibly user-friendly, making it easy for anyone to set up and manage a website, regardless of technical skills.
They offer 24/7 customer support via phone, email, and live chat, and the support team is always friendly and knowledgeable.
I’ve been on chat with them at all hours of the day and night and they have always been the most helpful!
In addition, Bluehost’s plans are scalable which means it is easy to upgrade as your website traffic and needs grow.
They also offer various security features such as automatic backups and SSL certificates, which gives peace of mind knowing your website is safe and secure.
Overall, Bluehost is a fantastic web hosting service that I highly recommend. They have everything you need to set up and manage a website, and their customer support is top-notch. They are reliable, affordable, and offer a range of features to help you grow and protect your website.
To highlight my favorite features of Bluehost:
- Easy setup: With one-click WordPress installation and a user-friendly control panel, Bluehost makes it easy to set up a new website.
- Reliable uptime: Bluehost offers a 99.9% uptime guarantee, meaning your website will be available to visitors almost all the time.
- Good customer support: Bluehost provides 24/7 customer support via phone, email, and live chat, so you can get help whenever you need it.
- Free domain name: Bluehost offers a free domain name for the first year when you sign up for a hosting plan.
- 30-day money-back guarantee: Bluehost offers a 30-day money-back guarantee, so you can try their service risk-free.
- Affordable pricing: Bluehost offers a range of affordable hosting plans, so you can choose the one that best fits your budget and website needs.
- Scalability: Bluehost offer various plans and options to upgrade, so you can start with a small plan and grow as your website traffic and needs grow.
- Professional Email: Bluehost allows you to create professional email addresses for your domain. No more thewanderlover@gmail.com, I can now create danielle@thewanderlover.com and much more!
You can use my link to save on your first year.
You can get your first year for as little as $2.95 a month instead of $10.99, just by using my link. Thats 73% off!
You’ll also get a free domain which you will set up as part of this process.
Steps to Start a Travel Blog
- How to choose a name for your travel blog
- Register a domain name and hosting for your travel blog
- Install WordPress on Bluehost
- Get to know your WordPress Dashboard
- Choose a theme for your travel blog
- Install some must have WordPress Plugins
- Start building your travel blog your travel blogger reputation
- Some must have pages
- Set up your social media accounts
- Start writing your travel articles
- Make money with your travel blog
- Resources
How to choose a name for your travel blog
Choosing a name for your own blog is an important decision that should reflect the theme and tone of your content.
Your blog name should be memorable, easy to spell and easy to say. It’s also important to consider if the name is available as a domain name and on social media platforms.
One strategy is to brainstorm a list of potential names and run them by friends and family to get feedback.
Another option is to play around with different combinations of words related to travel and you, and see what sounds good.
Be creative and have fun with it! Remember, this is your brand and it should represent you and your travel experiences.
Check that the domain name is available
Once you have come up with your perfect name, it’s important not to get too excited until you have checked availability.
You need to check that the domain is available. You don’t need to use a .com domain but I would recommend it as it’s usually more rememberable.
To check if your domain is available you can either just chuck it in Google and see what comes up.
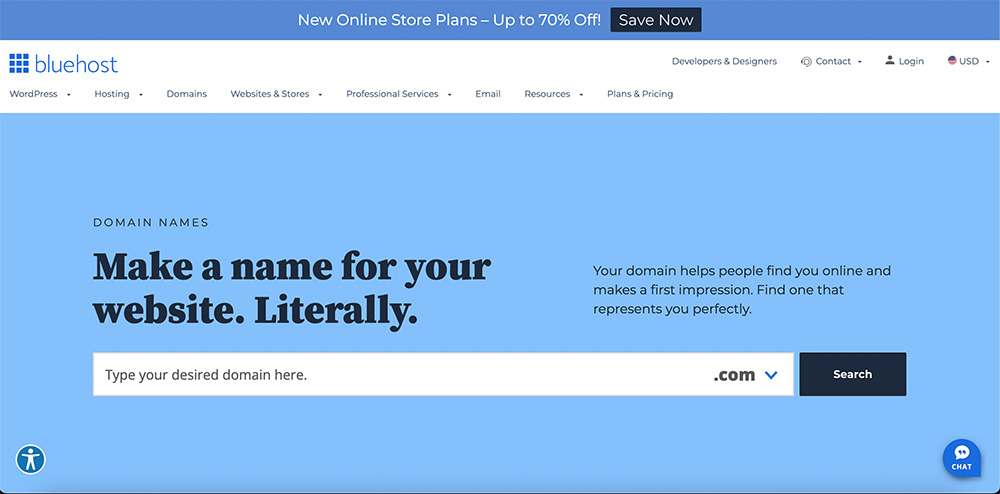
Or use Bluehost, where you can just drop in the domain you would like and it will let you know if it’s available. If it isn’t they will even give you some similar alternatives.
Check social media and make sure the name is available
How annoying would it be if you come up with your name, buy your domain, and then find out the instagram handle is taken. Ugh!!
Check on all the social media platforms and see if it’s available or if someone else has already set up that account.
You want to keep your brand consistent across all platforms and avoid any nasty surprises down the line, so its worth going through all these steps now.
Register your blog domain and set up your hosting
Now it begins to get exciting. Once you have your name and confirmed it’s available, it’s time to set up your hosting and domain.
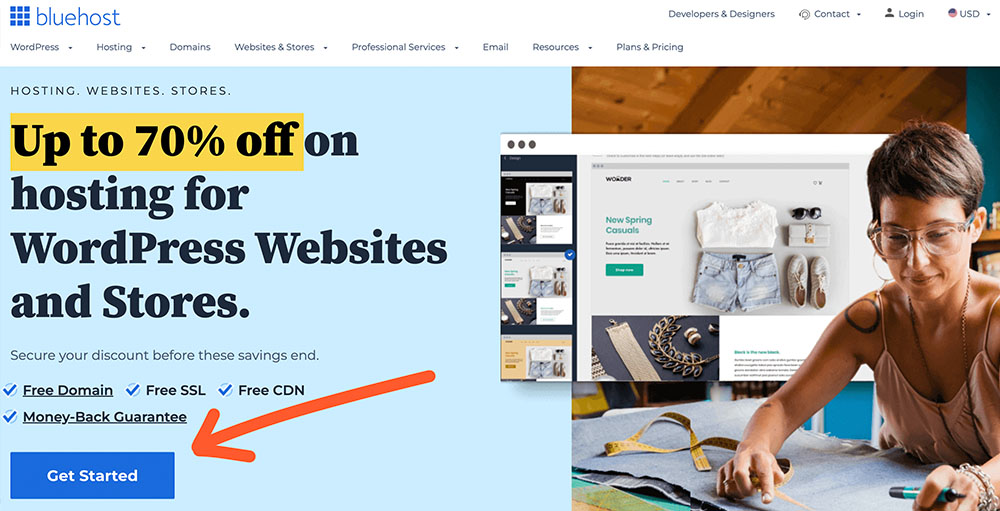
- Go to the Bluehost website and click on the “Get Started” button on the homepage.
Use my link to save on your first year.
You’ll also get a free domain which you will set up as part of this process.
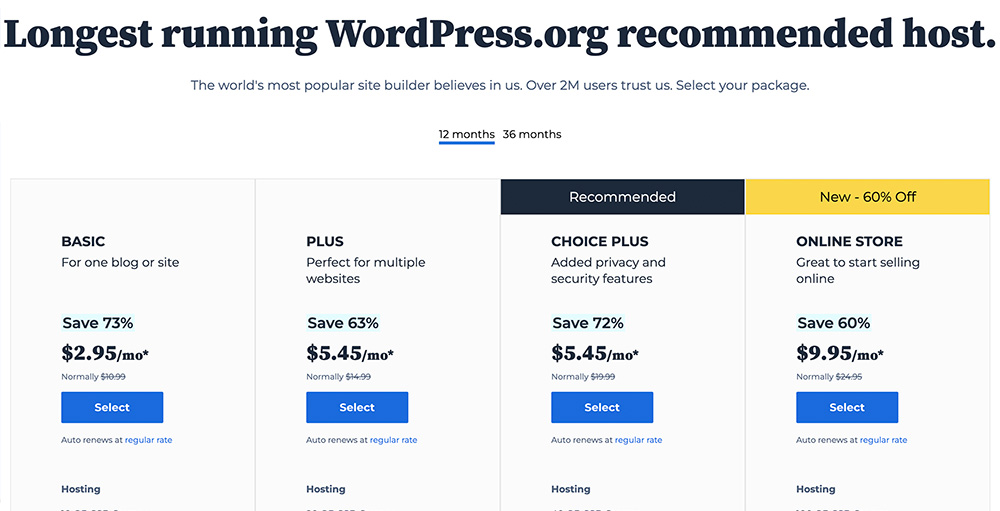
- Select the hosting plan that best fits your needs.
You can choose from shared hosting, VPS hosting, or dedicated hosting. The cheapest hosting option is not always the not best, and I use and recommend the Choice Plus at $5.45/month.
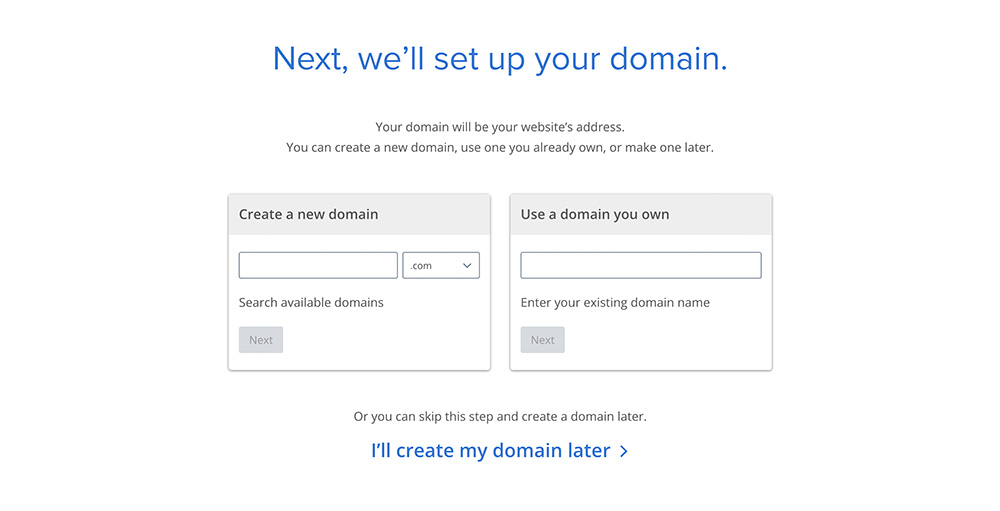
- Choose and register a your travel blog domain
You can either register a new domain name or use an existing one. If you choose to register a new domain name, you will be prompted to enter the desired name and check its availability.
Of course, you have already done your research and you know it’s available so chuck it in and click next.
- Enter your account information
Next up it’s going to ask you for your personal info including your name, email address, and billing information.
- Review and submit your order
Once your order is processed, you will receive an email with instructions on how to set up and access your hosting account.
🎉 Congratulations you now have a domain name and hosting for your website!
Install WordPress on Bluehost
Up next is installing WordPress on your new account with Bluehost. I will give instructions for the newer Bluehost interface.
- Login to your Bluehost Control Panel. Use the login information you got in your welcome email.
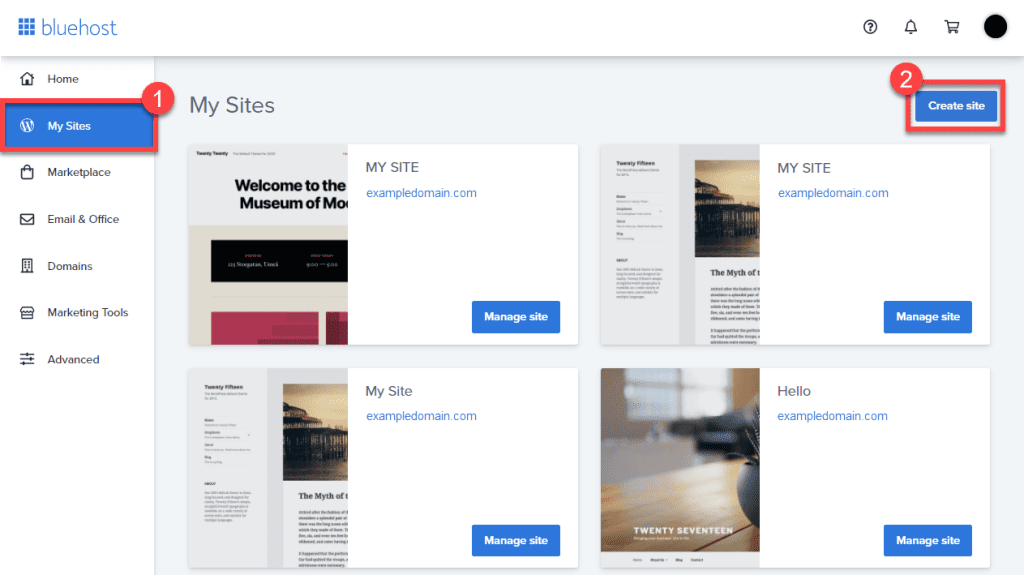
- Click the My Sites tab in the left hand navigation bar you will see the My Sites tab. Click on that to open the my sites page.
- Click the Create Site button.
- Select WordPress. Click Start Building under the WordPress option the screen that pops up.
- Enter Admin Information: You will then be prompted to enter your admin information.
- Site Name – This will be the name displayed on your site. Not your URL.
- Site Tagline – A brief description of your travel blog
- Advanced Tab:
- Email Address – This will be where your login information will be sent.
- WordPress Admin Username – The login name you will use to access your WordPress dashboard
- WordPress Admin Password – The password you will use to access your WordPress dashboard. Make this password complicated, you’ll be amazed at the number of hack attempts on successful travel blogs.
It will take a couple of minutes to run the installer, but once it’s done, that’s it. You have now installed WordPress on your hosting account!
Get to know your WordPress Dashboard
Next up, you are going to need to learn a bit about your WordPress Dashboard. The WordPress dashboard is like your website hub and is where you get access to various features and settings.
To get to your WordPress dashboard, go to https://www.yourdomain.com/wp-admin (replace yourdomain with your actual domain name). Your login information is the Username and Password you set when installing your WordPress install.
Once logged in, you will be taken to the WordPress Dashboard.
This is the first page that you see when you log in to your WordPress site. It provides a quick overview of your website’s recent activity, including new comments, published posts, and incoming links.
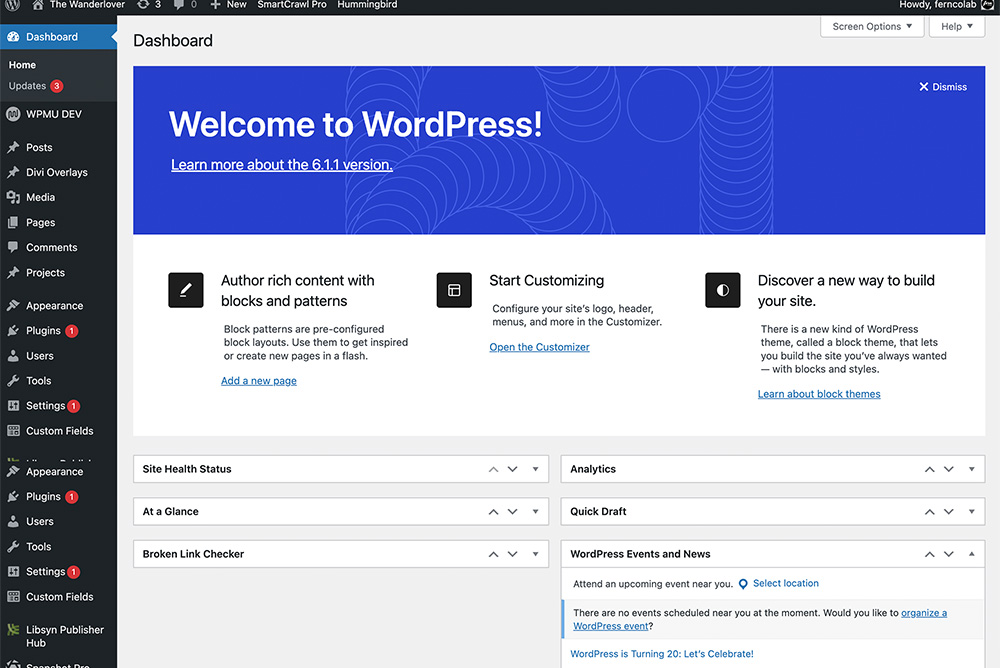
Everything you need to manage your blog is in the left hand column. To help you understand things, here’s a quick run through of some of the main things.
- Posts: This is where you will create, edit, and manage your all of your blog posts. You will be spending a lot of time in here writing and managing all your travel blogs.
- Media: This is where you will manage all of the media on your website, such as photos, videos, PDFs. You can bulk upload or delete, rename, add meta texts and stuff all in here.
- Pages: Pages are a bit different to blog posts. Typically you will use pages for static content that doesnt change that much, like your about page, contact page for example. Inside here you can view all of your published, draft, and scheduled pages from this section as well as create new ones.
- Comments: This is where you manage the comments readers post below your articles. You can reply, mark as spam, delete and view all your comments within a single page.
- Appearance: Appearance is important as its where you manage your main theme, and things like your menu structure.
- Plugins: One of the greatest things about WordPress is the seemingly endless supply of plugins that can be used to expand your blogs functionality. This section allows you to add, activate, deactivate, and delete plugins on your website. Remember too many plugins will slow down your website, so only use what you need.
- Users: This section allows you to add, edit, and delete users on your website. You can also assign different roles and permissions to users, such as administrator, editor, author, and subscriber.
- Settings: This section allows you to configure various settings for your website, such as the site title and description, the timezone, and the permalink structure.
Choose a theme for your blog
You are now ready to start building and designing your travel blog website!
The awesome thing about WordPress is the library of themes you can use to completely change the appearance of your blog.
There are 2 options, free and premium themes.
While a free theme will certainly get you going, I highly recommend finding a good premium theme to start with.
This will save you having to change later when you outgrow the features and functionality of a free theme.
Because you have a self hosted WordPress account, you have the option to use one of thousands of premium themes for your travel blog.
There are plenty of sites online where you can find WordPress Themes, and prices can be anywhere from $10-$1000s of dollars depending on the build quality or functionality. You can find a huge library of themes and plugins on ThemeForest and where you can also try out demo sites.
The Wanderlover website now uses the Divi theme, and I am so happy I made the switch a few years ago. Divi is one of the worlds most popular WordPress themes, and for good reason.
Some of my favorite features of Divi are:
- Ease of use: Divi has a visual drag and drop builder where you can edit text and images, change layouts, reorder sections and basically anything you want, directly on your website with absolutely no coding knowledge required what so ever.
- Customizable options: Divi comes with over 200 prebuilt websites which you can use as a starting point for your own travel blog, all of which are endlessly customizable.
- Responsive design: Responsiveness is important in modern day websites. Responsive means that the website will adjust and be optimized on different screen sizes like desktop, tablets and mobile phones.
- SEO friendly: Divi is optimized for SEO which makes getting your wordpress blog found on google easier.
- Compatible with most plugins: Because its such a well used theme, the majority of popular plugins work perfectly with Divi. These include Yoast SEO, google analytics, and contact form 7 to name a few.
- Huge community: There is a massive community of Divi users who all love to share tips, ideas, design inspiration and tutorials. Meaning it’s easy to find help and resources online.
- Great support and documentation: Divi has loads of detailed documentation and you can get support directly from the developers.
- Regular updates: Divi is updated regularly with new up to date features and improvements. Regular updates also make sure you are always safe and secure if and when security issues are discovered
Divi is also what I use to create seamless landing pages like the one for the Travel Influencer Handbook.
So I highly recommend Divi after using it for so many years.
You are welcome to choose any theme you like that fits your vibe, branding, and aesthetic!
Install Recommended Plugins
WordPress comes loaded with everything you need to get started right out the box.
But there are a few extra plugins you will want to install, and this applies to any WordPress website.
WordPress Security Plugin:
Do not skip this step. WordPress is used by millions of people everyday and so it’s important that you keep your site safe and secure from hackers, viruses spam and more.
To do this you can install a security plugin that does just this. There are several free and paid options available, and we could write a whole blog on just this. But here are my top free options for starting out
Image Compression Plugin
Being a travel blog, you are going to be sharing lots of images of your travels and experiences.
But if your images not optimized they will take up more site resources, increasing page load speeds, which will negatively impact your SEO and user experience.
Reducing image file sizes can be time consuming when done manually in tools like photoshop, but as a WordPress user, you ca have access to image compression tools that can streamline this process.
Here are my top free options when start a travel blog:
- Smush (I use the pro version of this plugin)
- EWWW Image Optimizer
- Compress JPEG & PNG Images
Performance/Cache Plugin
57% of visitors will leave your site if it takes longer than three seconds to load. Ouch!
To deal with this we can use a performance or cache plugin that will optimize our site data and files so that it can be loaded faster.
If you want to get into the technical details of what caching is and how it works, you can read this article from CloudFlare. Here are my top free recommendations for you when you start your WordPress blog:
- W3 Total Cache
- Hummingbird (I use the pro version of this plugin)
- WP Fastest Cache
SEO Plugin
SEO stands for search engine optimization, and is what gets your site ranking on google search.
This means you can get found organically online and bring more people to your blog, increasing traffic and monetization opportunities.
It’s important to think about search engine optimization early on as it helps you get your website discoverable faster. An SEO plugin will help you built an optimized website from the beginning.
Here are my recommended SEO plugins for your new WordPress blog:
- Yoast SEO
- All In One SEO
- Smart Crawl (The Wanderlover uses the pro version of this plugin)
With those plugins installed and configured. You are ready to get building!
Start Building Your Blog
When someone comes to your website, they should see this persona very quickly.
- Are you into luxury travel?
- Do you want to share tips on how to travel super cheap?
- Do you want to share itineraries for hidden gems off the beaten path?
- Do you want to focus on a specific place or rather from around the globe?
- Do you have a niche like solo female travel or family travel?
- Anything specific you want to bring to the travel community?
These are the questions you need to be asking yourself early, cause everything you do from here will portray this and help build your reputation.
Create Must-Have Pages
Your travel blog will contain a mix of posts and pages.
The travel articles you write will be “posts” and might be travel guides, recommended restaurants, itineraries and more.
Static content that doesn’t change much, such as your about page and contact page will be “pages”.
Remember on our dashboard we have different places for posts and pages.
There are a few pages that are must haves for any travel blog:
About Page
This is your chance to share you story and tell people about yourself.
What makes you unique, different and exciting to follow.
This will be a highly visited page on your website, because it will be there for a long time and people want to know about you, so make it interesting and personal.
Over time your about page will develop and change as you become a more experienced blogger, and it’s important to keep it up to date.
In summary your about page should give people a clear reason to stick around and follow you.
Contact Page
This is where fans, followers and potential clients will be able to reach out to you, so it should be done before you even post your first article.
Use a simple contact form that makes it easy for people to reach out to you and get in touch.
You can also add things like your social media handles so they can contact you on your other platforms.
Start Social Media Accounts
Social media is so important to growing as a travel blogger or influencer, so you need to start building your social media presence. You should create accounts with the most popular platforms to reserve your blog name:
- TikTok
- YouTube
Remember to keep your name and branding consistent and share links to your website in your bio.
When you post content on your blog, you can then repurpose and distribute it across your social network, which can significantly expand your reach and engagement.
Brands and businesses love to work with travel bloggers and influencers who have a wide reach of engaged readers on socials and web.
Write Your First Travel Blog Post!
Now for the most exciting part, writing your own travel articles for your target audience!
Once you’ve done the above steps you are ready to start writing and sharing your travel stories. You are going to want to create lots of blog articles, but it’s important to remember, quality is more important that quantity.
Google likes well written articles over 1500 words much more than short 500 word blogs.
What is the goal of your travel blog article?
When you are writing your blog, think about the impact it is going to have on the people reading it.
Are you inspiring someone to visit the place you are talking about, are you providing travel tips, or are you giving a list of your favorite spots for dinner?
Many bloggers now use an AI checker to verify that any AI-assisted writing maintains their personal voice and authentic storytelling style.
Topics for your travel blog articles
You will be writing a variety of articles that cover a variety of topics. Each topic should be its own article.
These topics could include:
- Favorite destinations around the world
- Must have travel items
- Hotel reviews
A great tip here is to choose topics and subjects that add value to the reader, answer common questions, and have high monthly search volume with little competition.
This will keep people coming back for more and also help you rank on Google.
You can use tools like Google Trends, or Answer The Public to learn what people are searching for and asking online. You can also just look for the people also asked box on Google:
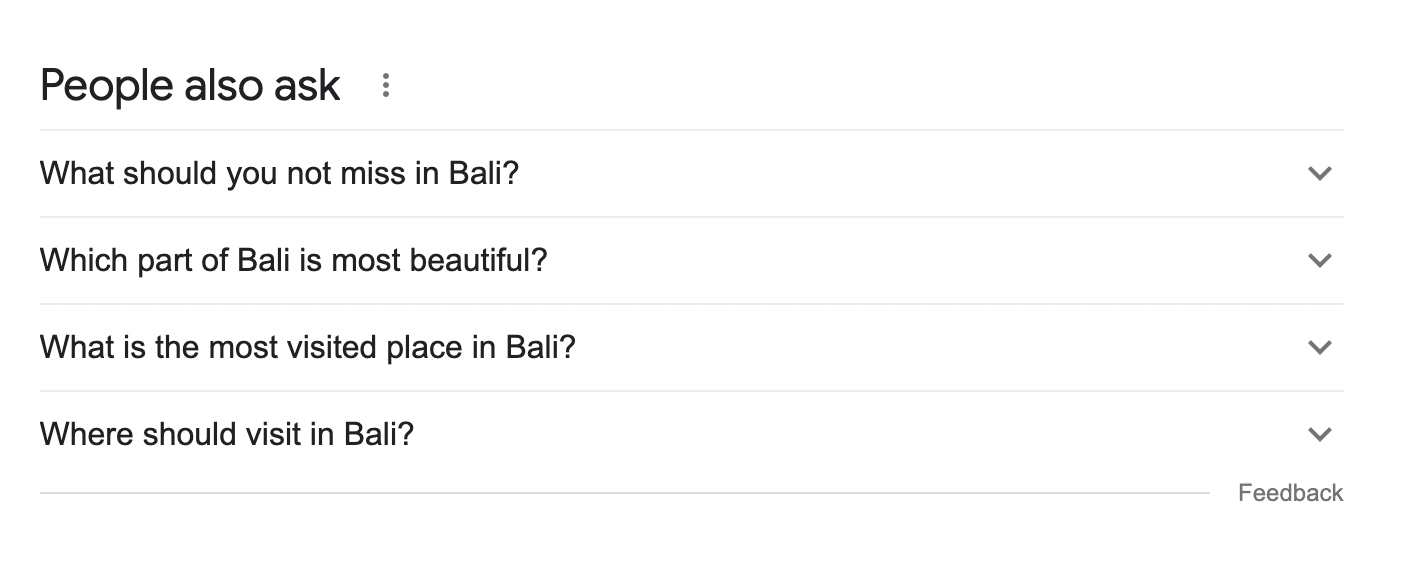
This is a great way to find out what kinds of questions people are asking on Google, related to the original search. It is also much easier to rank an article on “What is the most beautiful part of Bali” than it is to just target “Bali.”
You can also use Google’s Keyword Planner to see which specific keywords people are searching and how competitive it is.
Show your personality in your writing
The style you write them in is totally up to you and should portray the persona you talk about in your about page.
Remember that people will follow you because the way you tell stories or give information.
There are a lot of travel bloggers out there, and the big names may seem like they dominate a lot of the top search keywords and locations.
It will take time for you to rank your content, so it’s important that you engage with your audience.
Show people that there is a real person behind the blog, share honest stories, the highs and the lows. Being a relatable travel blogger is a sure way to drive engagement and retention.
Monetizing Your Travel Blog
Now that we have your travel blog set up, let’s learn about all the ways we can monetize!
Monetizing a blog means finding ways to earn money from the content and traffic on the blog.
Essentially, monetization is the process of turning the blog into a revenue-generating business, and the best part is – it can be set up to be completely passive!
But let me add a quick reality check – you probably, most likely, will not be monetizing for at least a few months. But I’d love for you to prove me wrong!
This is because generally, you need to build up your traffic and readership to your website, which takes time to grow and efforts to optimize your Marketing strategy.
Technically, there’s nothing to stop you from monetizing from Day 1 (for example let’s say if you create a digital product and make a sale the day your blog launches).
But generally, you can start monetizing through basic forms of advertisement when you start reaching around 1000 views a month.
Below I’ll give a description of different types of monetization and how it each works:
Affiliate Marketing
By partnering with businesses you recommend (think: Booking, Expedia), you can sign up to be an affiliate and promote the business to your readers through a unique link or code.
You will then earn a commission on any sales brought through your link! The commission rate varies between affiliate programs, but it’s a great way to monetize by promoting and reviewing products/services related to your niche.
*IMPORTANT NOTE* In most countries, you are legally required to disclose any sponsored or affiliate content to your audience.
Sponsored Posts
Once your blog grows in popularity, you can start pitching brands to help them gain exposure through sponsored posts. This is where a brand pays you to write a dedicated blog post about their product/service, giving them access to your loyal readers.
*IMPORTANT NOTE* In most countries, you are legally required to disclose any sponsored or affiliate content to your audience.
Display Ads
Another option once you grow your loyal reader base is to sell ad space on your blog. You can use ad networks such as Google AdSense to easily manage and display these ads on your site, but the key is to make sure they are all relevant or else you may risk coming off as spammy.
Digital Products
Digital products provide value to your audience depending on their needs, plus it’s a great way to monetize without having your income tied to your time!
- Ebooks (Example: Travel Influencer Handbook)
- Travel Guides
- Canva, ClickUp, Notion Templates
- Online Courses (Example: Wanderlover Business Academy)
- Online Webinars
- Email Courses
- Memberships (Example: Digital Nomad Society)
Consulting Services
Once you are positioned as an expert, with your personal brand, website, assets, and experience up on your blog, you can start charging for your expertise in the form of 1:1 hourly consults or monthly coaching.
🤩 Check Out the Start Your Business Intensive
Conclusion
And there you have the ultimate guide to starting your travel blog. If you follow these steps, you should definitely have yours up within the next week.
Travel blogging has been a challenging adventure since I quit my corporate job but it has been so worth it.
Let me know in the comments if you have any questions! I’m always happy to help.
Resources and Links
Hosting
WordPress Themes
Marketing Tools
Learning and Reading
- Travel Influencer Handbook
- Instagram For Business
- Platforms that Pay
- The 4 Hour Work Week
- Secrets of the Millionaire Mind
Share on Pinterest